- Home Assistant Connect ZBT-2
- Pre-Requisite
- Docker Compose
- Add Home Assistant Integrations
- Add Matter Devices via Home Assistant App
- Extra Credit
- Troubleshooting
- Factory Reset
- References
Home Assistant Connect ZBT-2
Instead of using a hub like the IKEA DIRIGERA to communicate with matter/thread supported home-automation devices, I went with the open-source route. Purchanced a Home Assistant Connect ZBT-2 since I am already using Home Assistant.
Firmare Installation
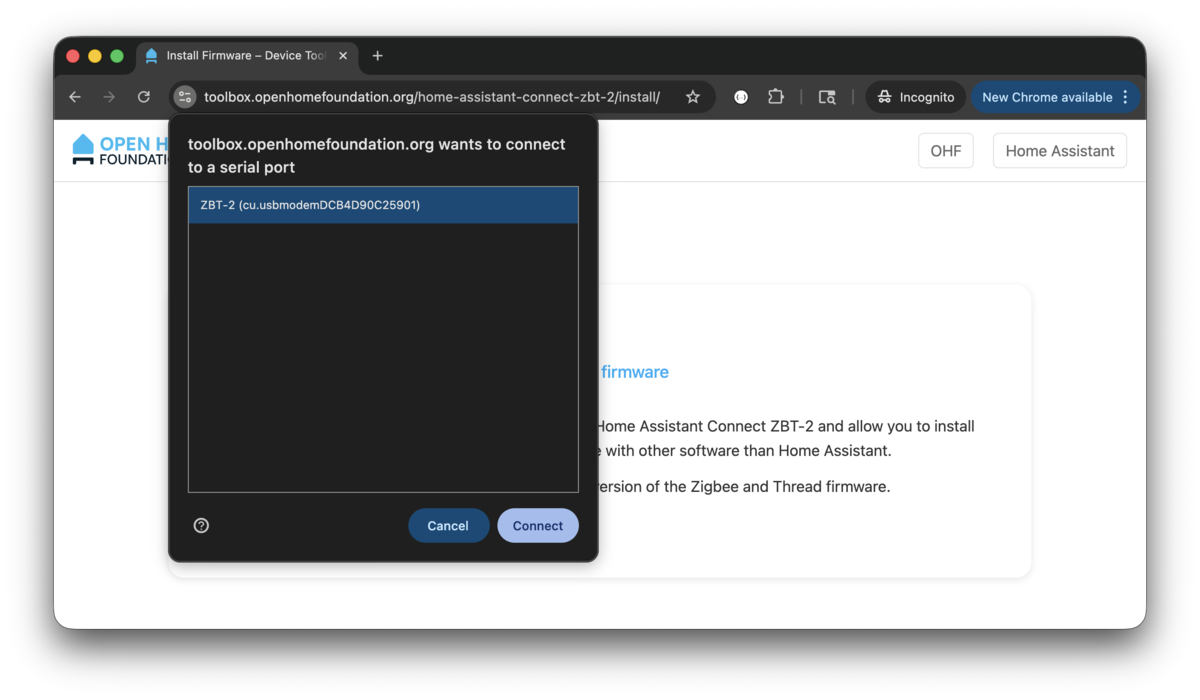
- Plug your ZBT-2 to your laptop (Mac for me).
- Go to toolbox.openhomefoundation.org with Chrome.
- Click
INSTALL FIRMWARE. - Select the ZBT-2 device and
Connect. - Click
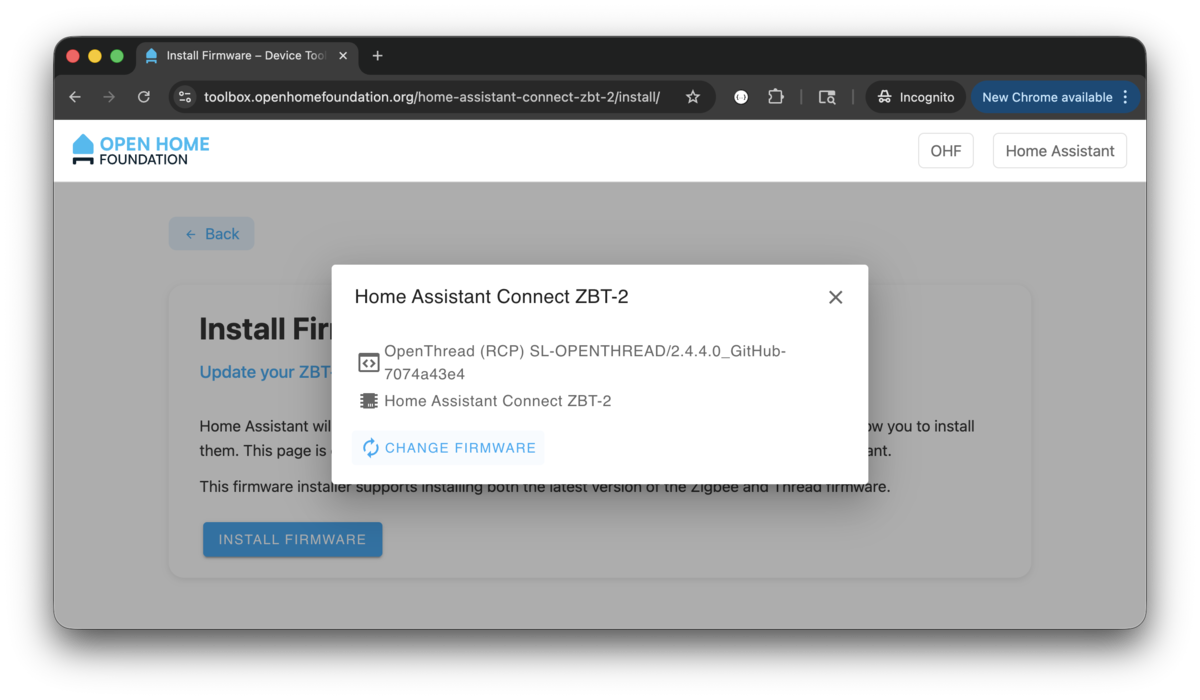
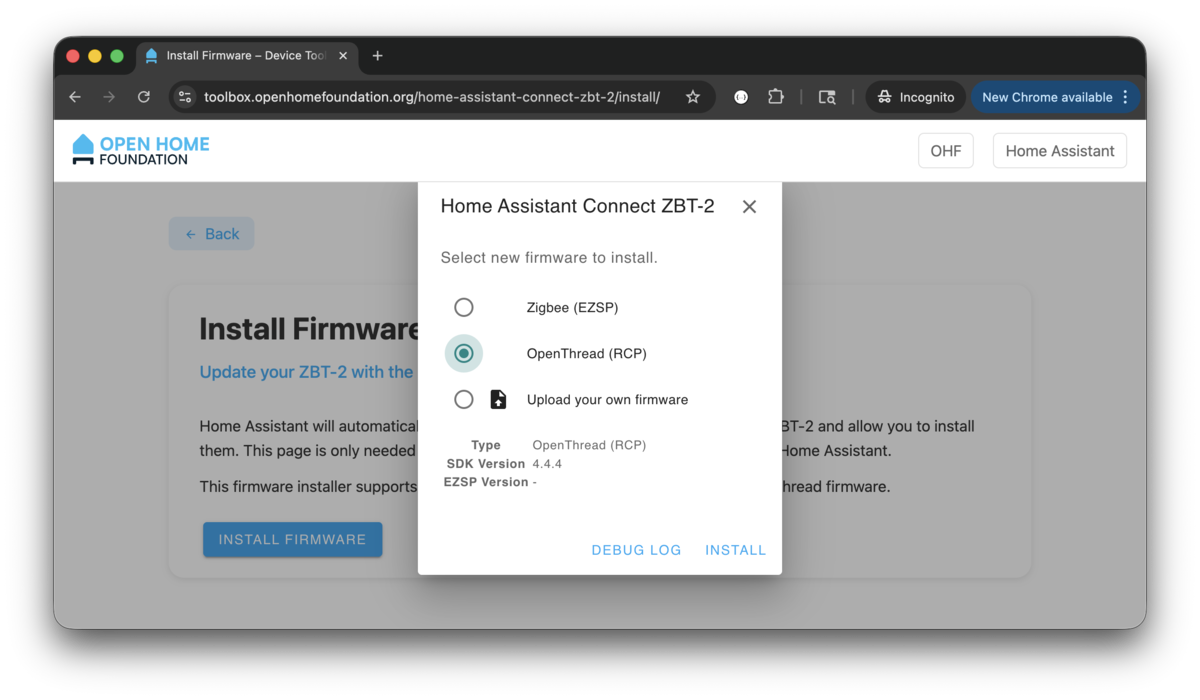
CHANGE FIRMWAREand select theOpenThread (RCP)firmware and clickINSTALL.
Connect to Raspberry Pi
Once the firmware has been installed, plug it into the raspberry pi and confirm the device is showing up. We will be using the /dev/serial/by-id/ path for the docker-compose yaml file setting.
$ ls -lh /dev/serial/by-id/*
lrwxrwxrwx 1 root root 13 Jan  1 16:35 /dev/serial/by-id/usb-Nabu_Casa_ZBT-2_DCB4D90C2590-if00 -> ../../ttyACM0
Pre-Requisite
Avahi Daemon
Make sure you /etc/avahi/avahi-daemon.conf have at least the following options. We are only allowing br0 (which is my bridged network).
[server]
use-ipv4=yes
use-ipv6=yes
allow-interfaces=br0
deny-interfaces=docker0,veth*,br-*
ratelimit-interval-usec=1000000
ratelimit-burst=1000

[wide-area]
enable-wide-area=yes

[publish]
publish-addresses=yes
publish-hinfo=no
publish-workstation=no
publish-domain=yes
Restart the service if you make changes.
$ sudo systemctl enable avahi-daemon
$ sudo systemctl restart avahi-daemon
$ sudo systemctl status avahi-daemon
Router Advertisement Daemon
Router Advertisement Daemon is IPv6 router announcement service. These advertisements let devices on the local network:
- Learn the IPv6 prefix to use
- Autoconfigure their own IPv6 addresses (SLAAC)
- Discover the default router
- Learn specific routes (optional)
- Know timing info (how often to expect updates)
Replace the interface name with yours.
fd15:9ef4:1f7f:9c18::/64: IPv6 equivalent of private IPs like 192.168.x.x
Notice! I am actually not too familiar with this service. ChatGPT generated it for me. If this service is stopped, Accessory pairing will fail.
interface br0
{
    AdvSendAdvert on;
    MinRtrAdvInterval 3;
    MaxRtrAdvInterval 10;

    prefix fd15:9ef4:1f7f:9c18::/64
    {
        AdvOnLink on;
        AdvAutonomous on;
        AdvRouterAddr on;
    };

    route fd15:9ef4:1f7f:9c18::/64
    {
    };
};
Restart the service if you make changes.
$ sudo systemctl enable radvd
$ sudo systemctl restart radvd
$ sudo systemctl status radvd
Docker Compose
Because I have all my services in a single docker-compose.yml file, they will look like the following.
Notice! My otbr environment variable for OT_INFRA_IF is set to br0 because I have bridge setup on my Pi, yours is likely just eth0.
services:
  home-assistant:
    container_name: home-assistant
    image: ghcr.io/home-assistant/home-assistant:stable
    environment:
      TZ: America/Los_Angeles
    network_mode: host
    privileged: true
    restart: unless-stopped
    volumes:
      - './home-assistant/config:/config'
      - '/etc/localtime:/etc/localtime:ro'

  matter-server:
    container_name: matter-server
    image: ghcr.io/matter-js/python-matter-server:stable
    network_mode: host
    restart: unless-stopped
    security_opt:
      - apparmor:unconfined
    volumes:
      - './matter-server/data:/data'
      - '/run/dbus:/run/dbus:ro'

  otbr:
    container_name: otbr
    image: openthread/border-router:latest
    cap_add:
      - NET_ADMIN
    devices:
      - /dev/serial/by-id/usb-Nabu_Casa_ZBT-2_9C139EAC8D34-if00:/dev/ttyACM0
      - /dev/net/tun:/dev/net/tun
    environment:
      OT_RCP_DEVICE: spinel+hdlc+uart:///dev/ttyACM0?uart-baudrate=460800
      OT_INFRA_IF: br0
      OT_THREAD_IF: wpan0
      OT_LOG_LEVEL: 7
      OT_REST_LISTEN_ADDR: 0.0.0.0
      OT_REST_LISTEN_PORT: 8081
      OT_WEB_LISTEN_ADDR: 0.0.0.0
      OT_WEB_LISTEN_PORT: 8981
    network_mode: host
    privileged: true
    restart: unless-stopped
    volumes:
      - './otbr/data:/data'
Start up the services.
$ docker compose up home-assistant otbr matter-server --remove-orphans -d
[+] Running 3/3
 ✔ Container otbr            Running
 ✔ Container matter-server   Running
 ✔ Container home-assistant  Running
Confirm the container status.
$ docker compose ps --format "table{{.Name}}\t{{.Image}}\t{{.Service}}\t{{.RunningFor}}\t{{.State}}\t{{.Status}}"
NAME             IMAGE                                           SERVICE          CREATED          STATE     STATUS
home-assistant   ghcr.io/home-assistant/home-assistant:stable    home-assistant   49 seconds ago   running   Up 48 seconds
matter-server    ghcr.io/matter-js/python-matter-server:stable   matter-server    49 seconds ago   running   Up 47 seconds
otbr             openthread/border-router:latest                 otbr             49 seconds ago   running   Up 48 seconds
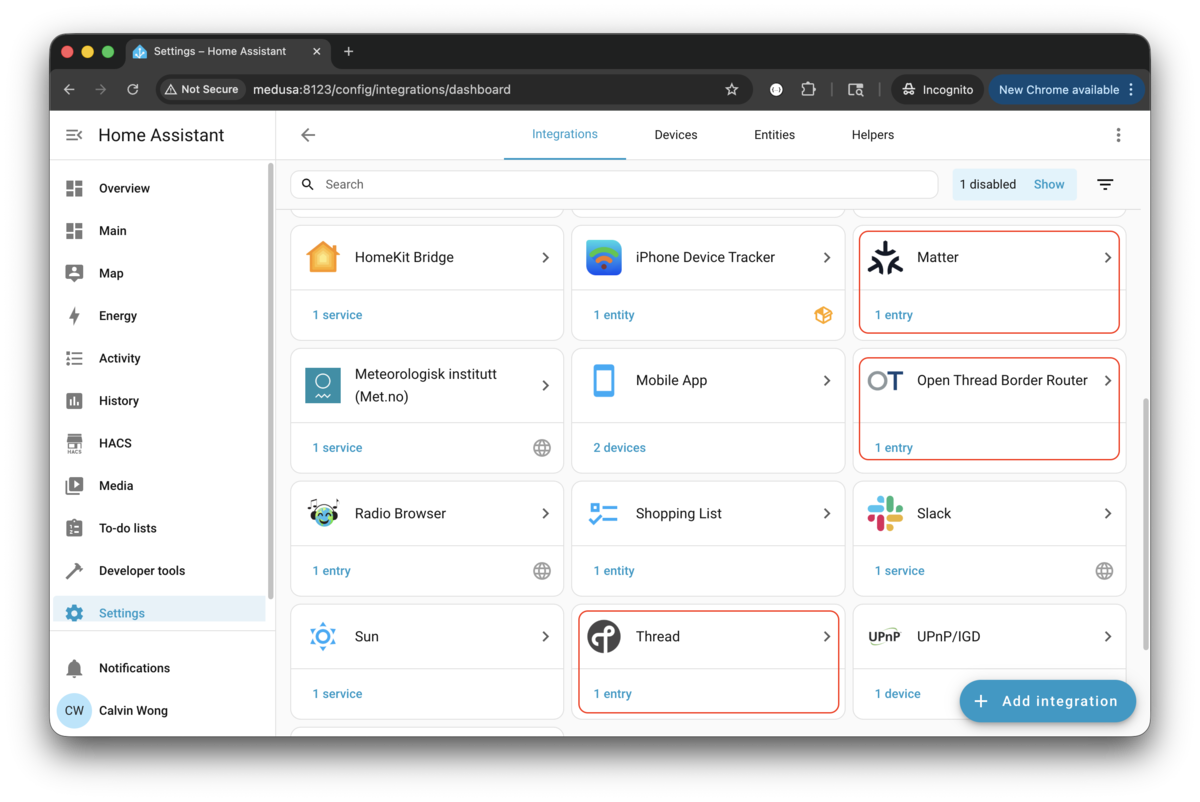
Add Home Assistant Integrations
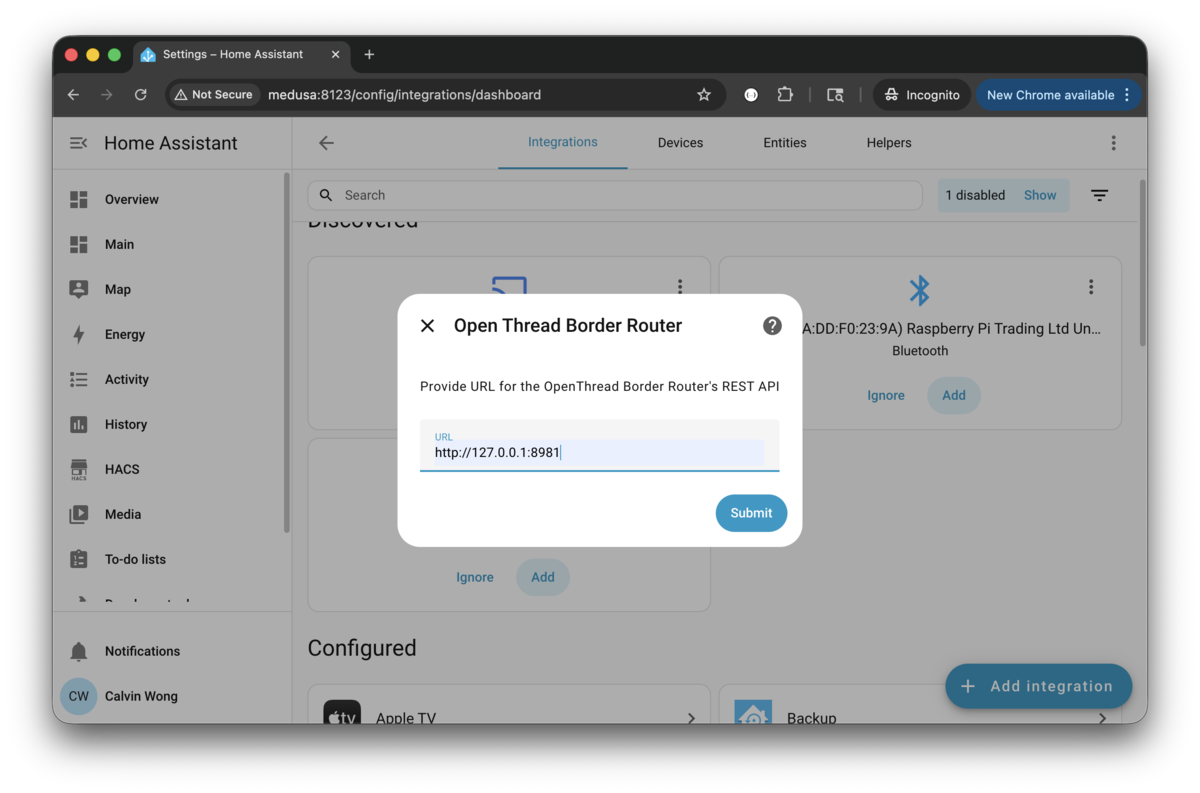
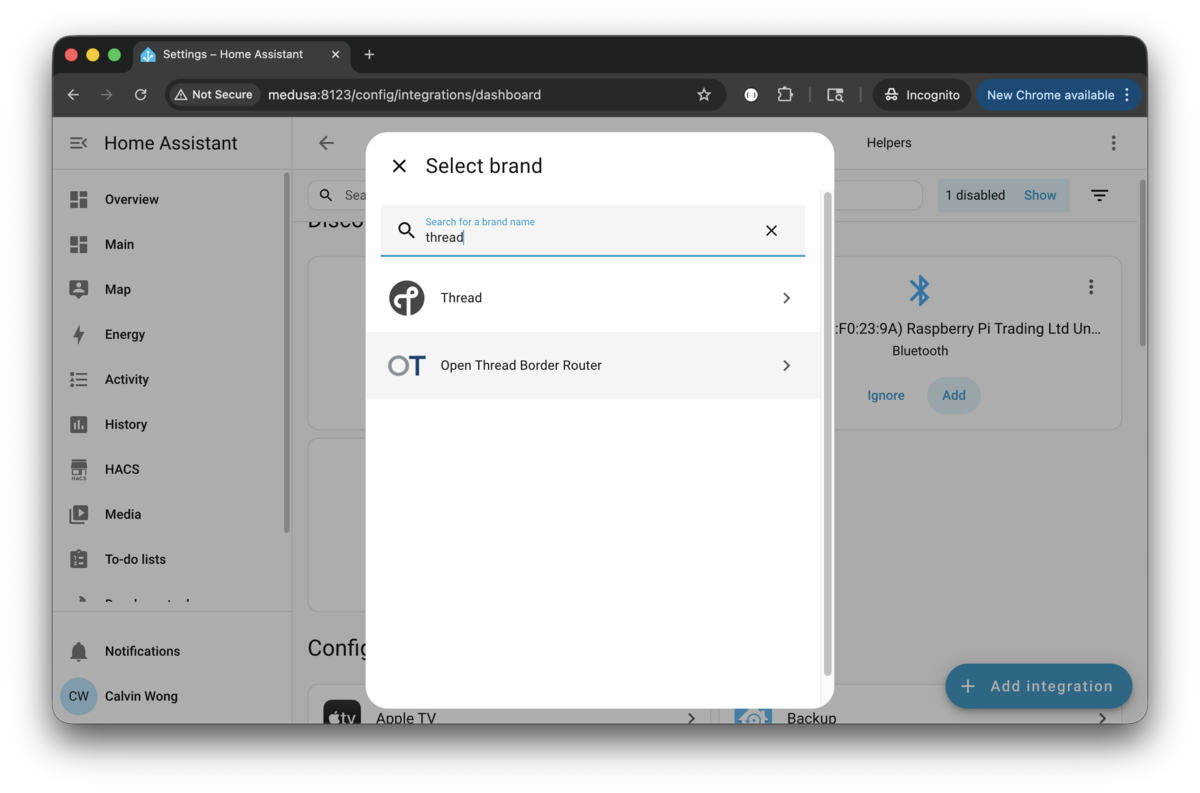
Log into your Home Assistant admin portal and add the following Matter/Thread integrations.
- Open Thread Border Router: This will prompt you to enter the URL for REST API (
http://127.0.0.1:8081). - Thread
- Matter
To be safe, restart all the docker services.
$ docker compose restart home-assistant
[+] Restarting 1/1
 ✔ Container home-assistant  Started

$ docker compose restart otbr
[+] Restarting 1/1
 ✔ Container otbr  Started

$ docker compose restart matter-server
[+] Restarting 1/1
 ✔ Container matter-server  Started
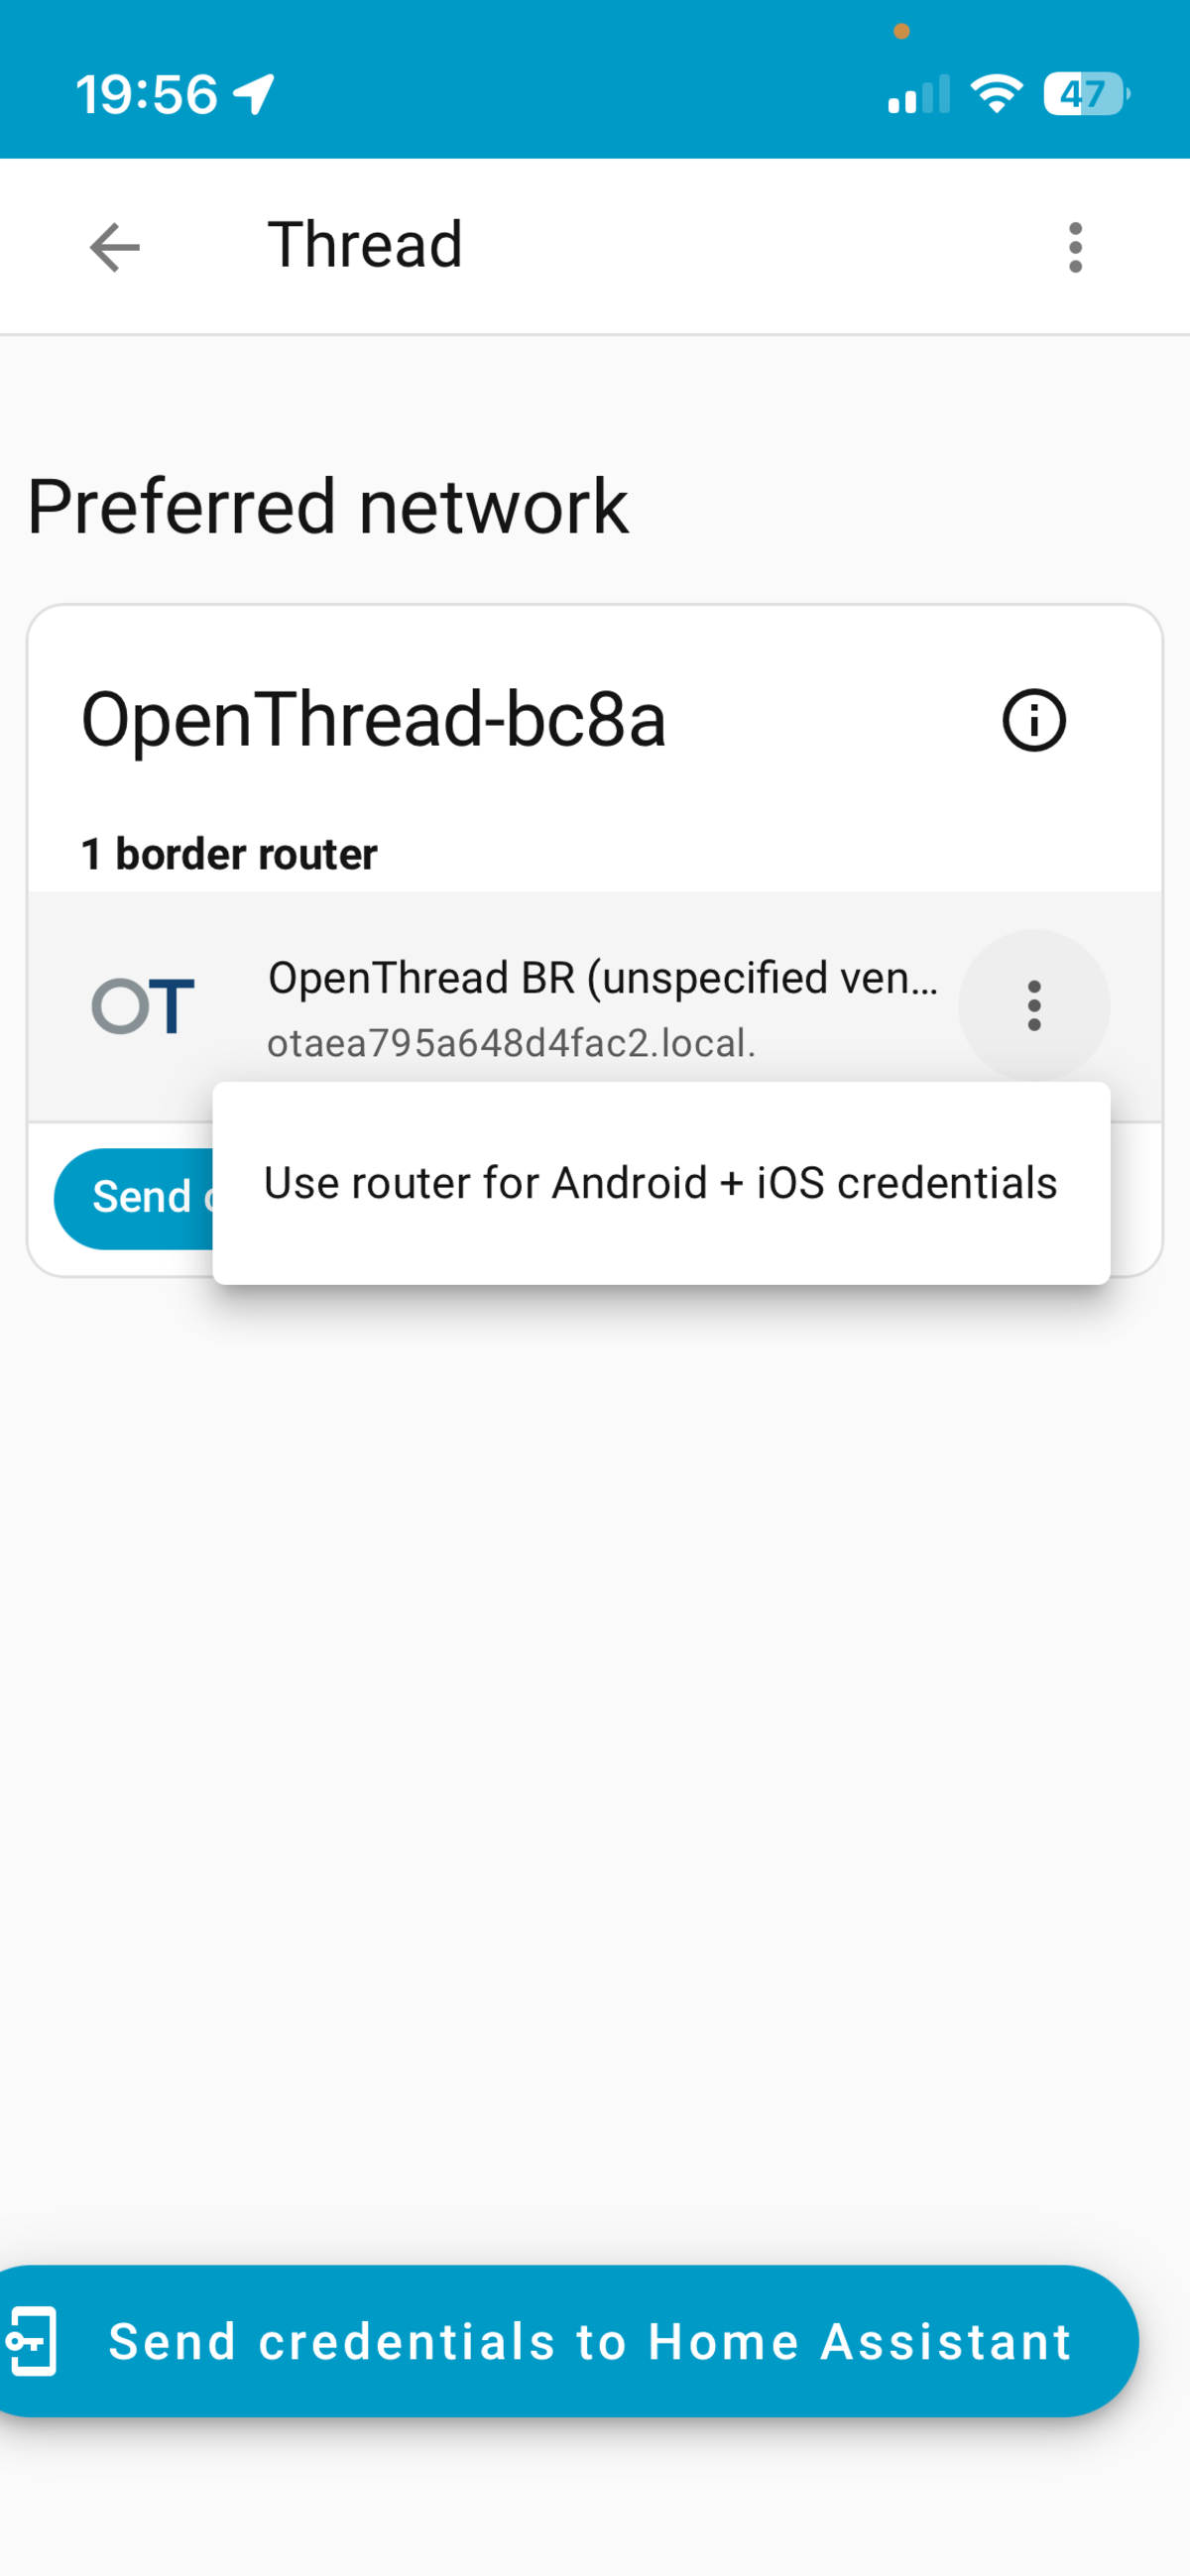
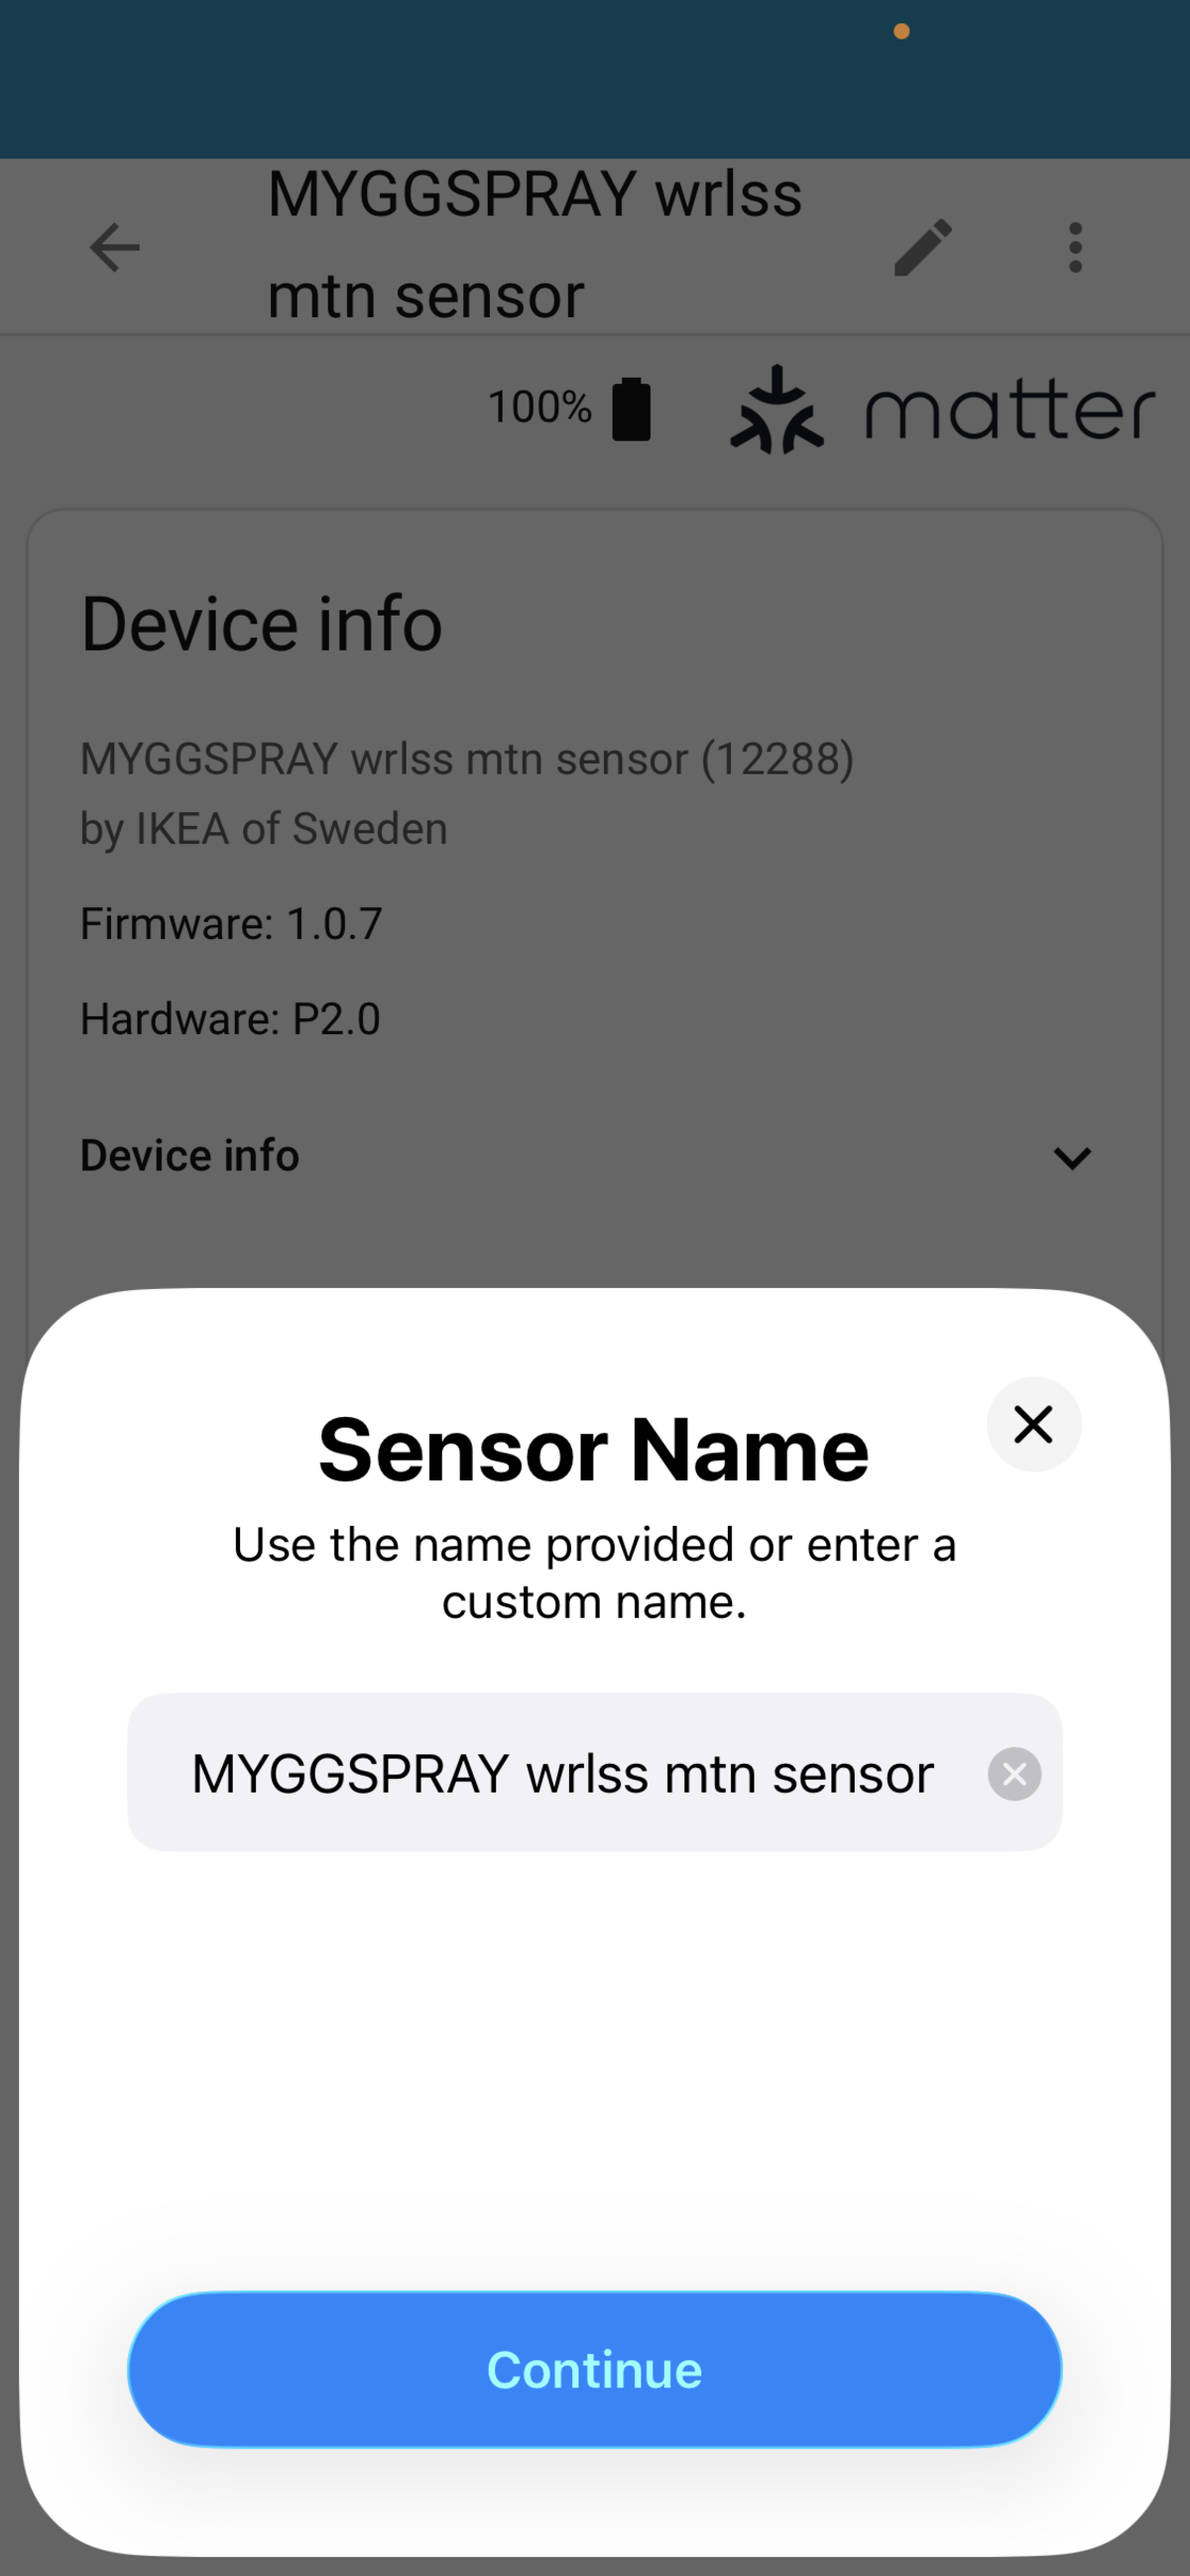
Add Matter Devices via Home Assistant App
Go to the Home Assistant app on the phone
- Under the Thread integration, you should see
border router. Tab the 3-dots andUse router for Android + iOS credentials, which you canSend credentials to phone. - Settings › Companion app › Debuggin › Thread, find the network name and add credential to Apple Keychain by clicking
Transfer to Home Assistant. - We can now add Matter devices.
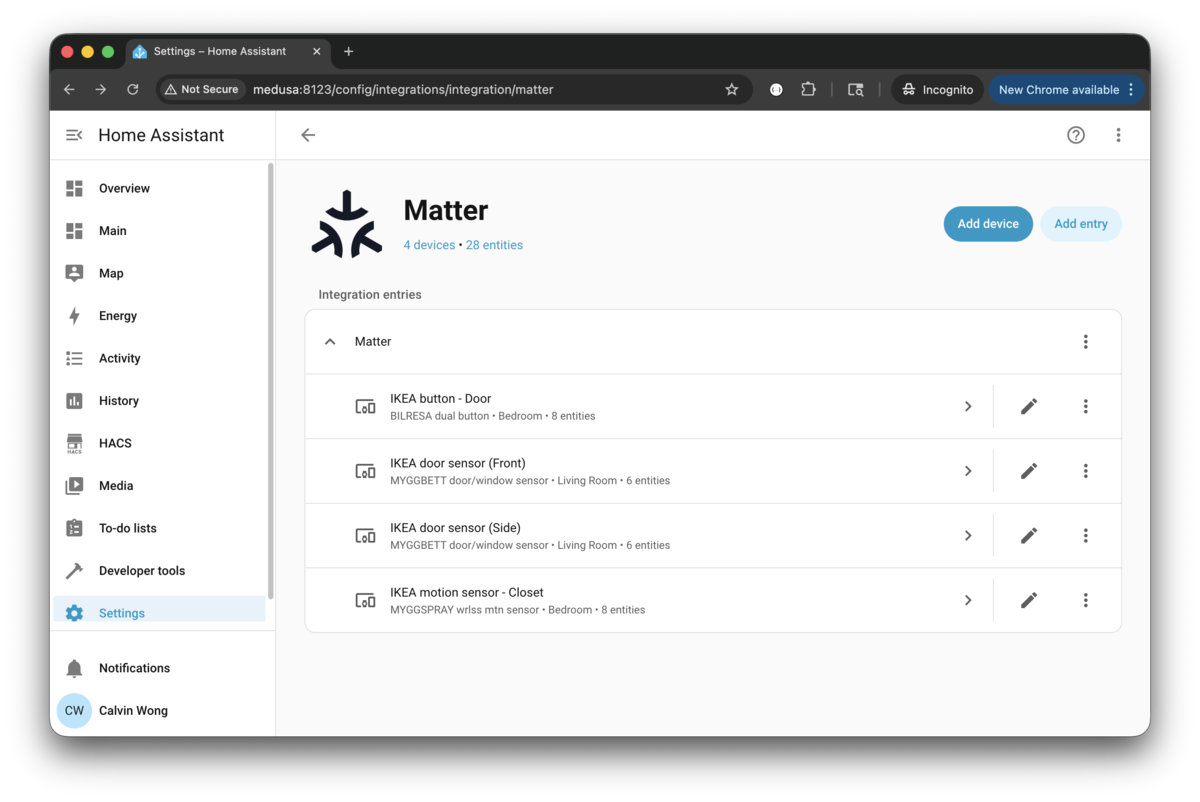
Once the devices have been added, you can confirm under Matter in Integration.
Extra Credit
Home Assistant Cloud provides you with a secure remote connection to your instance while away from home. But since I don’t want to pay the monthly fee, I was able to get the following setup working using DuckDNS and Caddy.
Requirements
DuckDNS
You will need to create an account with DuckDNS and select a “sub-domain”. I store my TOKEN environment variable in /usr/local/etc/docker/duckdns.env.
  duckdns:
    container_name: duckdns
    image: lscr.io/linuxserver/duckdns:latest
    env_file:
      - /usr/local/etc/docker/duckdns.env
    environment:
      TZ: America/Los_Angeles
      SUBDOMAINS: sub-domain-you-picked-from-duckdns
    network_mode: host
    restart: unless-stopped
Port Forwarding
On your router, forward the following ports 80/443 to your host (Raspberry Pi 5). They are used by Caddy for ACME challenges (cert issuance & renewal) and serving TLS traffic.
Reverse Proxy and HTTPS
I use Caddy for reverse proxy/Let’s Encrypt. The Caddyfile will contain the sub-domain we picked from DuckDNS.
  caddy:
    container_name: caddy
    image: caddy:2
    network_mode: host
    restart: unless-stopped
    volumes:
      - './caddy/etc-caddy/Caddyfile:/etc/caddy/Caddyfile'
      - './caddy/data:/data'
      - './caddy/config:/config'
This is the bare minimum Caddyfile settings required for reverse proxy.
##################################
# LAN HTTPS (.local)
##################################

https://home-assistant.local {
    reverse_proxy 127.0.0.1:8123 {
        transport http
    }
    encode gzip
}

##################################
# External HTTPS (DuckDNS)
##################################

home-assistant.sub-domain-you-picked-from-duckdns.duckdns.org {
    reverse_proxy 127.0.0.1:8123 {
        transport http
    }
    encode gzip
}

##################################
# Optional global HTTP -> HTTPS catch-all
##################################

http:// {
    redir https://{host}{uri}
}
Once that is done, I am able to access my Home Assistant instance anywhere via home-assistant.sub-domain-you-picked-from-duckdns.duckdns.org.
Troubleshooting
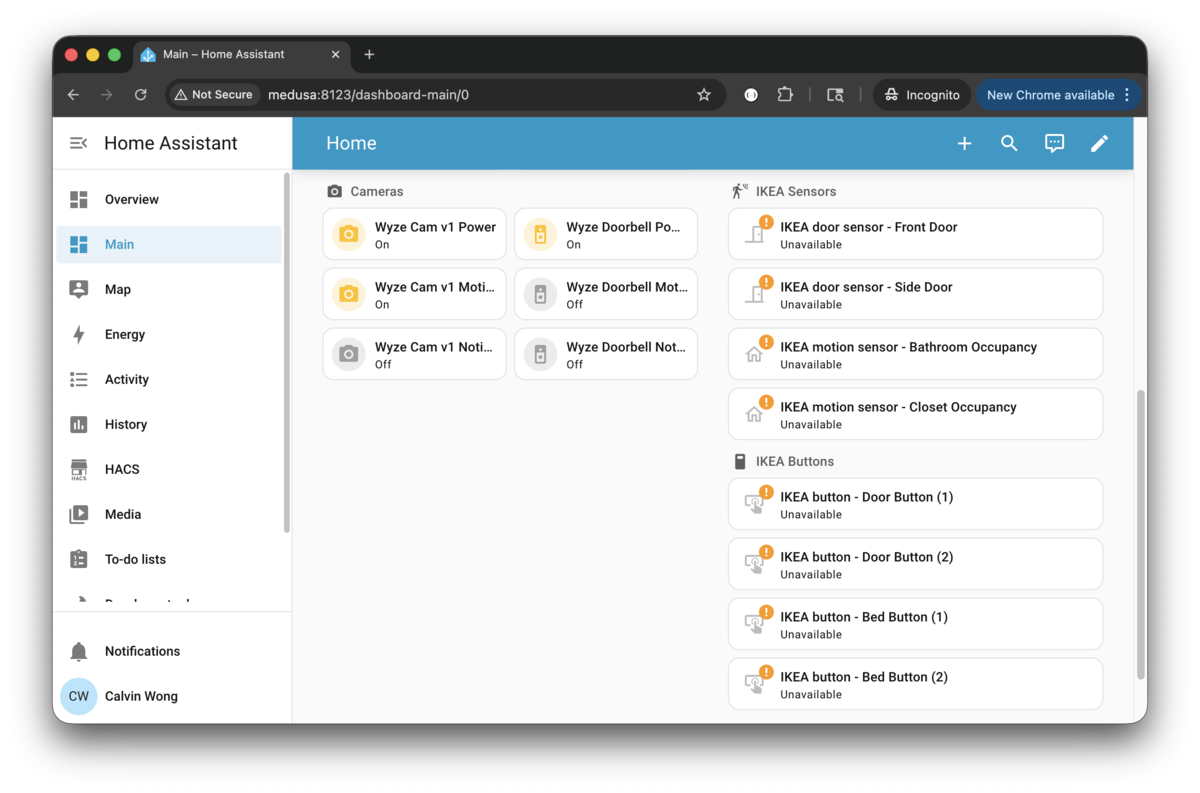
When all your Matter devices are showing Unavailable status. Here are some steps you can take to bring it back.
1) Go into Devices & Services, delete Thread and Open Thread Border Router.
2) Stop the containers.
$ docker compose down home-assistant otbr matter-server --remove-orphans
[+] Running 3/3
 ✔ Container home-assistant  Removed
 ✔ Container matter-server   Removed
 ✔ Container otbr            Removed
3) Start up the containers again.
$ docker compose up home-assistant otbr matter-server --remove-orphans -d
[+] Running 3/3
 ✔ Container otbr            Running
 ✔ Container matter-server   Running
 ✔ Container home-assistant  Running
4) Wait 15 seconds.
5) Verify the OBTR status.
$ docker compose exec -it otbr ot-ctl state
disabled
Done

$ docker compose exec -it otbr ot-ctl dataset active
Error 23: NotFound
6) Add Thread and Open Thread Border Router integrations like Add Home Assistant Integrations.
7) Confirm the OTBR status once Open Thread Border Router is added.
$ docker compose exec -it otbr ot-ctl state
leader
Done

$ docker compose exec -it otbr ot-ctl dataset active
Active Timestamp: 1
Channel: 26
Wake-up Channel: 16
Channel Mask: 0x07fff800
Ext PAN ID: 5b5ee99d71511221
Mesh Local Prefix: fdaa:a2a2:eacd:7d2d::/64
Network Key: febd7f33eee11c8805799a6daec7c892
Network Name: OpenThread-bc8a
PAN ID: 0xbc8a
PSKc: 0e9238d5939cd5597ef054de6bee7c49
Security Policy: 672 onrc 0
Done
8) Setup phone app following Add Matter Devices via Home Assistant App.
Factory Reset
I somehow got the border router in a broken state which left me unable to access or pair any accessories.
Here are some steps from chatgpt which allows me to reset and delete all the OpenThread “networks” -
docker compose stop home-assistant
sudo rm -f home-assistant/config/.storage/thread.datasets

docker compose exec otbr ot-ctl factoryreset
sleep 5
docker compose exec otbr ot-ctl ifconfig up
sleep 5
docker compose exec otbr ot-ctl dataset init new
sleep 5
docker compose exec otbr ot-ctl dataset commit active
sleep 5
docker compose exec otbr ot-ctl thread start
sleep 5
docker compose exec otbr ot-ctl br enable
sleep 5
docker compose exec otbr ot-ctl state

avahi-browse -rt _meshcop._udp

docker compose start home-assistant

docker compose stop home-assistant otbr

sudo systemctl stop avahi-daemon
sudo rm -rf /var/run/avahi-daemon/*
sudo systemctl start avahi-daemon

docker compose start otbr

# wait 20sec

avahi-browse -rt _meshcop._udp

docker compose start home-assistant

# wait 2-3min, you should be able to "Send credentials to phone" successfully and able to pair accessories ...